
Reports
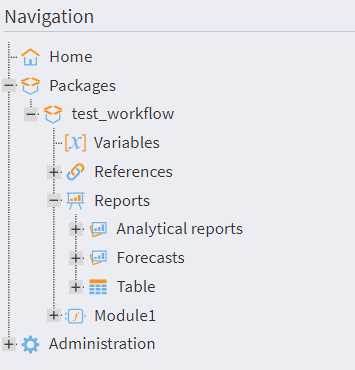
Sharing reports enables employees who are not familiar with analysis methods to answer analytical queries based on models prepared by analysis experts. In the workflow pane, the expert builds various models. The Reports pane is what the end user can use. To access it, go to Navigation > Reports.
There are two ways to create reports:
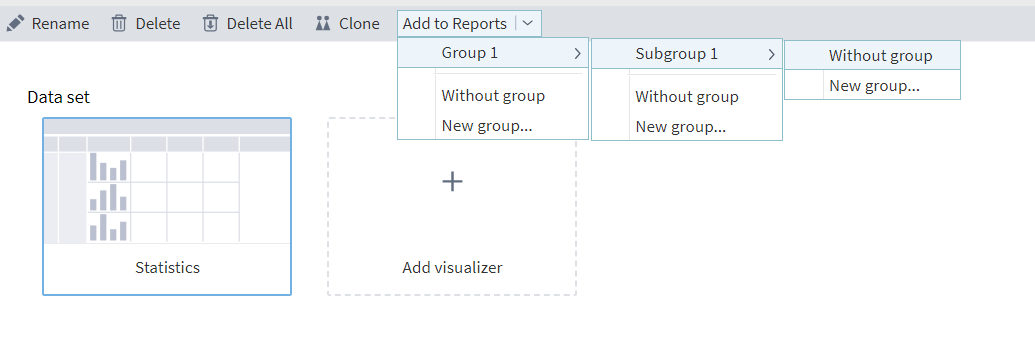
- Right-click on the desired visualizer and hover over the Add visualizer to reports menu item, where you can select:
- an existing group
- following the menu, you can select a subgroup or create a new subgroup
- without group
- new group
- an existing group

- Select the visualizer
- Click the Add to reports button, and the report will be added to the "without a group" list.
- Open the drop-down list next to the button, where you will be prompted to place it in an existing group or create a new one.
- In the additional menu, you can select a subgroup or create a new subgroup for an existing group.
You can manage report groups and subgroups in the following ways:
- Organize report groups and the reports themselves into a separate group
- Move report groups or reports to subgroups of any nesting level
- Create report subgroups of any nesting level
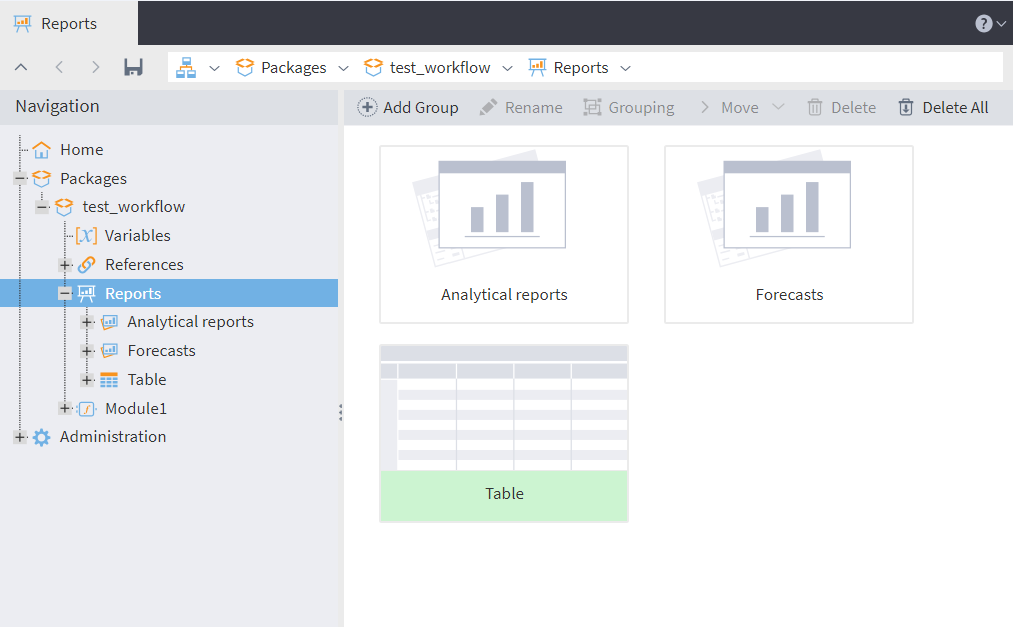
It is advisable to combine reports into groups based on their semantic content. For example, the "Analytical reports" group might contain various data cubes, while the "Forecasts" group might contain forecast charts for certain values. This grouping is very convenient for the end user's navigation: they will open the Reports pane, selects the desired group, and activate the required report. After this, the platform will automatically execute the corresponding workflow and display the result based on the configured view.
To manage created reports, go to Navigation, then go to the Reports tree node within the required package's hierarchy. The Reports pane will open in the main area. It has a toolbar where you can create new report groups, rename and delete existing groups, edit, rename, and delete reports.
Note: Edits in a report will also affect its source visualizer.
Reports that are currently open are highlighted in green. To update an open report, click Reread data in its context menu. In this case, all nodes located before the node with the report will be stopped and reactivated. Note that this will also deactivate all other reports configured for the deactivated nodes.
Users often need reports that focus on a specific subset of data, such as information for a single client or a particular region. In data analysis, this targeted subset is called a slice. While analysts create standard reports for common needs, they can't anticipate every view a user might require. To solve this, the system allows users to create their own custom report views. However, a key limitation is that these custom views are temporary and cannot be saved.
To see the report that was generated from a specific visualizer, right-click it and select Show in reports from the context menu. You will be taken directly to that item in the Reports pane.

Read on: Data