
The First Workflow
If you are working in the Enterprise, Standard, or Team edition, you must first log in to enter Megaladata. Authenticate by using one of the methods described in the article Authentication in Megaladata.
There is no authorization for the Personal and Community editions.
After authorization (or after starting a desktop edition), you get to the homepage. From here, you can perform the following operations:
- New Package: Create a package. You will be prompted to select a save/location path.
- New Draft: Create a new package without saving it. Saving a draft package will be possible after you start working with it.
- Open Package: Open a package created earlier.
Important: By default, packages are not autosaved. If you close the application window (browser tab) without saving, all changes will be lost. The autosave option can be enabled in the settings (see Packages for details).
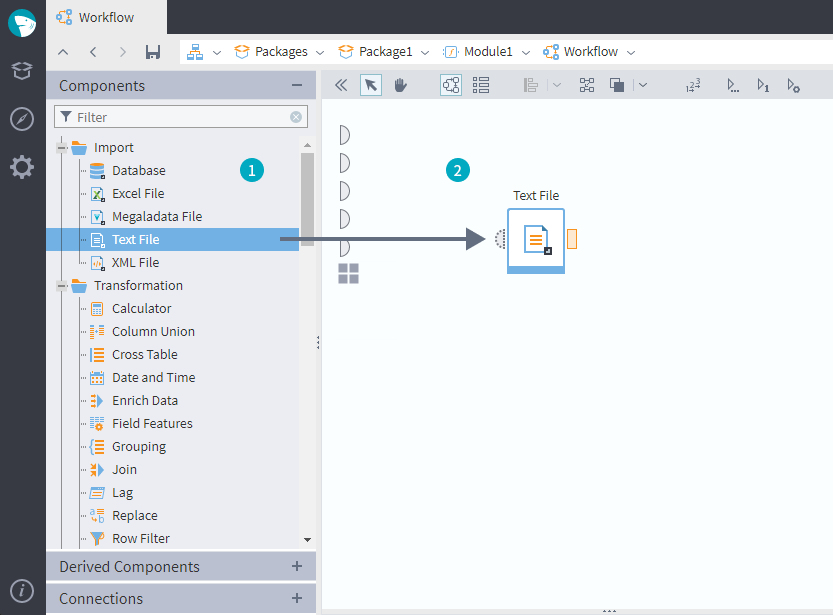
When you create a new package or draft, you will be taken to the workflow page. It consists of (1) the Components pane and (2) the workflow area. By dragging the standard components listed in the component pane, you can add them to the workflow, as shown in the figure:
Example: A simple workflow can import data from external sources, transform it, and export (outputing a report). Let's create a workflow that will generate a list of 10 best clients.
The workflow will perform the following actions:
- Import sales information from the Sales.txt file.
- Filter 10 clients with the highest purchase sums.
- Export the result.
To use any component in the workflow, drag it from the Components pane to the workflow area.
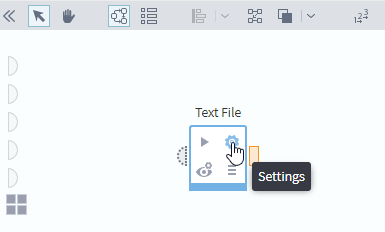
Select the Text File component in the Import section of the Components pane and move it to the workflow area. This will create the first node of the workflow—the import node. If you click it, you will see some icons representing possible actions. Open the wizard, as shown in the figire:
In the wizard, specify the location of the Sales.txt file in the File Name field and proceed through all the steps.
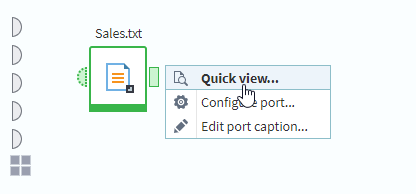
After configuring the node, execute it by clicking Run in its action menu. The node will import the data and send it to the node's output port. You can see the imported data using the Quick View… command in the context menu of the port:
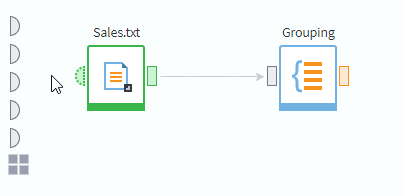
The next step is calculating a purchase amount for each client. To perform it, drag and drop the Grouping component to the workflow area. Set the data processing sequence by connecting the output port of the import node with the input port of the Grouping node, as shown in the figure:
In the Grouping node configuration wizard, set the Client Card field as the group, and the Sum field as a parameter. After configuring and running the node, you will see the information about total sums of the clients' purchases in its output port.
Now, sort this data by sum descending using the Sorting component. Send the result dataset to a filter node which will filter the first 10 rows. To create it, use the Row Filter component. In the resulting node's wizard, set the filter as Row number <= 10.
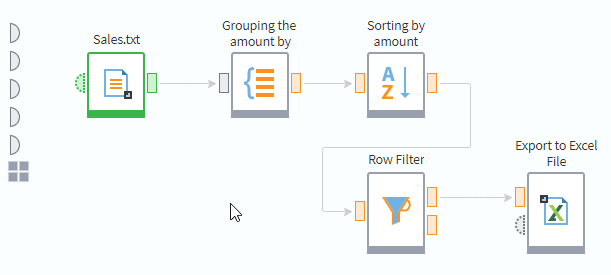
Add an export node to the workflow, and/or configure a visualizer to review the results. The workflow with an export node added is demonstrated in the figure:
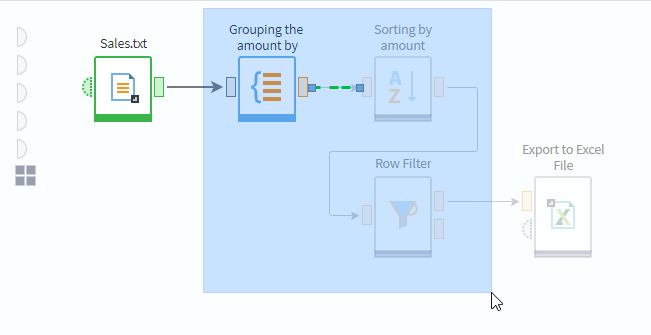
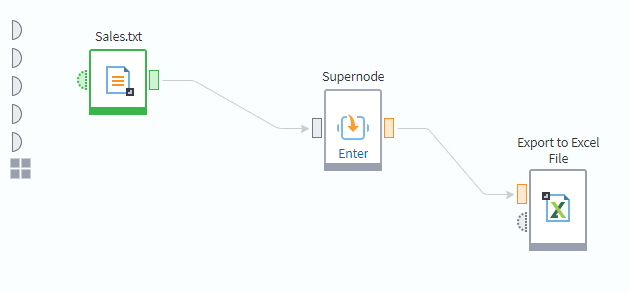
The nodes forming the TOP 10 list of clients can be grouped together as a separate function by wrapping them into a supernode. Select these nodes and create a supernode by clicking ![]() Collapse nodes to supernode on the toolbar.
Collapse nodes to supernode on the toolbar.
The following images demonstrate the workflow before and after using this button:
Later on, the supernode executing the function set by a user can be published as a derived component and reused in other workflows along with standard components. The basic principles of creating solutions based on custom components are described in Workflow Design.
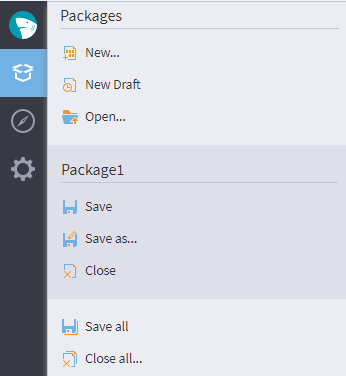
Save the package before closing, using the package menu (see the figure):
Read on: Project Design Principles