
Examples of importing data from an Excel file
Example 1. Importing an entire sheet
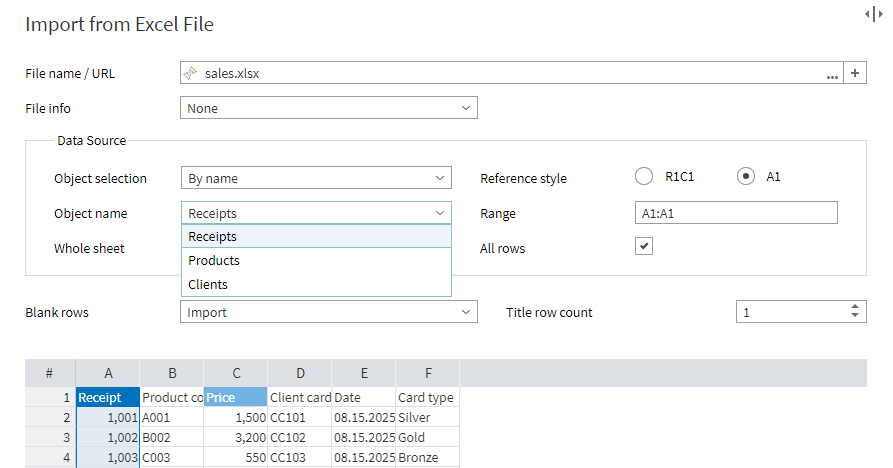
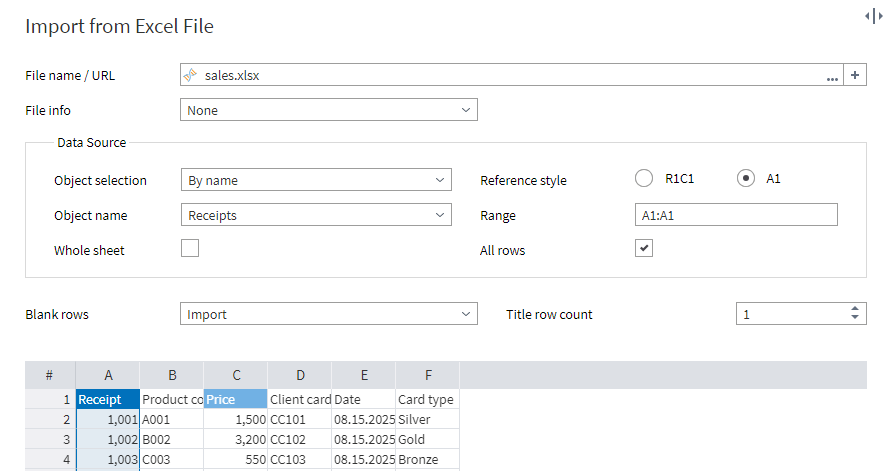
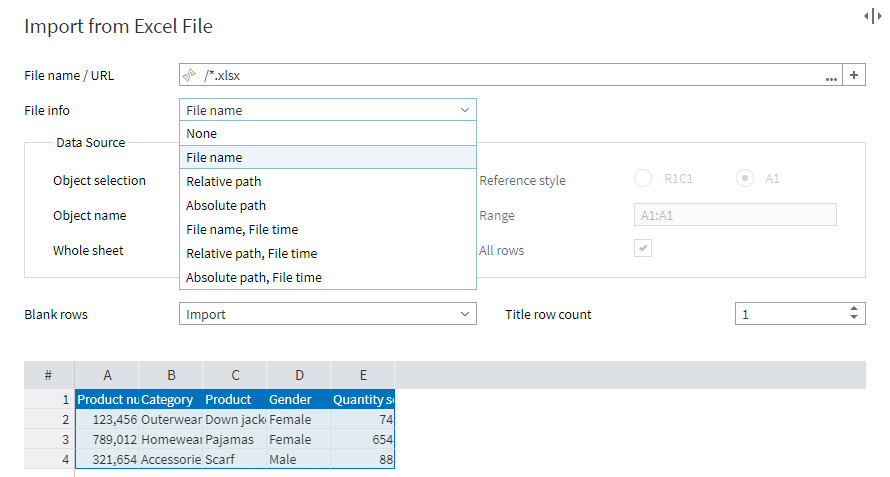
When importing from an Excel file, after specifying the location of the document itself (e.g., Sales.xlsx), you need to choose which sheet will be imported. Sheets can be indicated by their sequence number or by their name.
- By number (the sequential number of the sheet in the workbook)
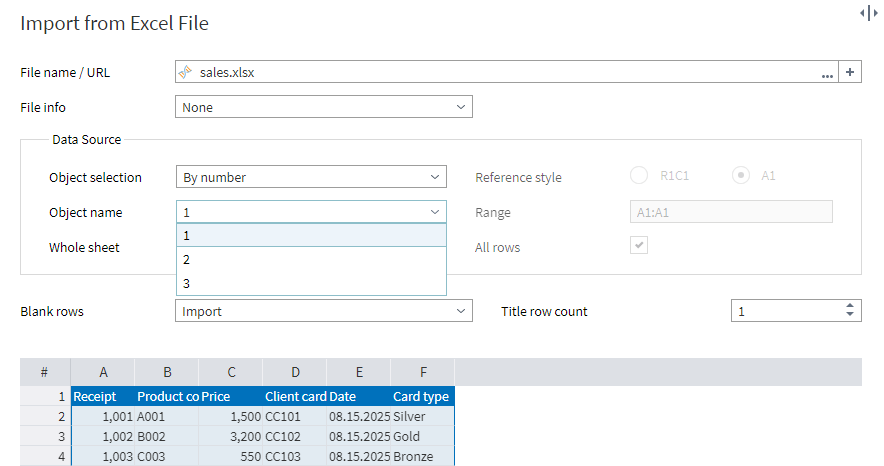
- By name (the name of the sheet in the workbook)
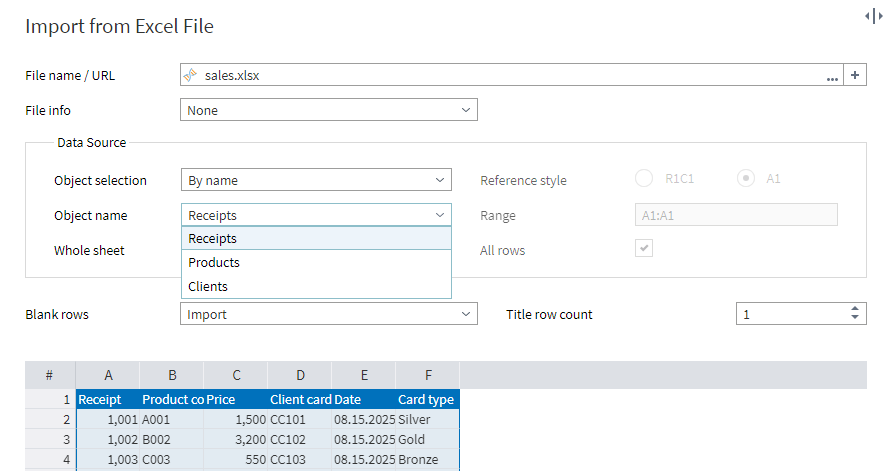
You can leave the other parameters at their default values:
- Whole sheet: marked (the entire sheet, i.e., all the rows of the file, will be imported).
- Blank rows: the default value is Import. If the sheet contains empty rows, they will also be imported. If you don't want to import empty rows, select Exclude. If you need to import all rows up to the first empty row encountered, select Up to the first empty row.
- Title row count: The default value is 1, indicating that only the first row contains column headers.
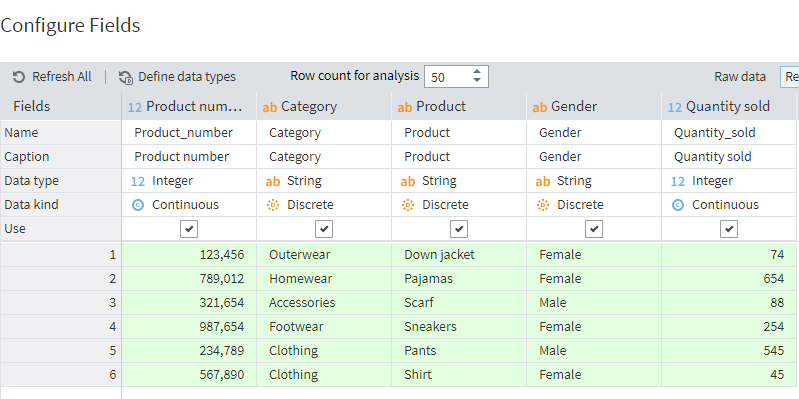
In the next page of the wizard, Configure fields, you can change the default names and captions (labels) of the fields. By default, field captions are set the same as names.
In addition, you can select the fields for import by marking/unmarking the Use checkbox for each column. By default, all fields are selected.
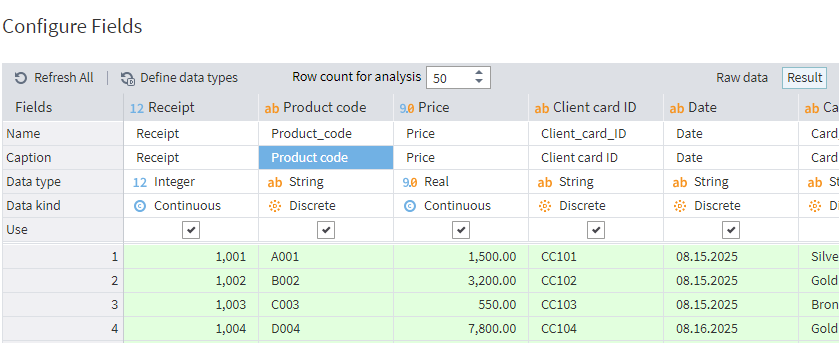
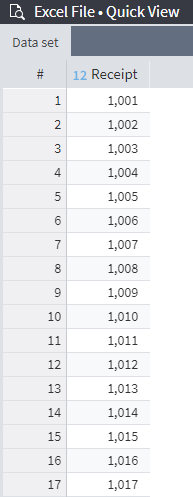
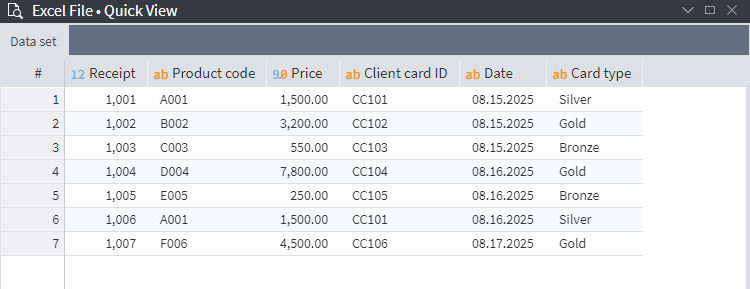
Here is how the resulting dataset for this example looks:

Important: It is not possible to import multiple sheets at the same time.
Example 2. Importing a named range
To import a named range created in Excel, select Named range as the value for the Object selection parameter and specify the range in the Object name field below (in this example, Product).
Note: Pay attention to the All rows parameter. If this is selected, all rows up to the end of the sheet will be included, even if they are not part of the range in the Excel file. In the current example, we unmark this checkbox to exclude extra rows.
The other parameters can be left at their default values.
Here is a screenshot of the resulting dataset:
Important: Simultaneous import of multiple named ranges is not supported.
Example 3. Importing a range using references
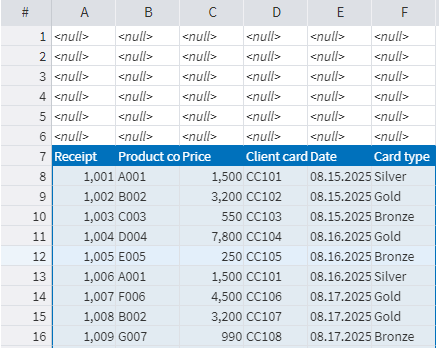
The goal of this example task is to import the following sheet:
To do this, set By name or By number for the Object selection parameter, and unmark the Whole sheet checkbox. The parameters for referencing a range for import will become available.
In the current example, we enter the range A7:J14 in the Range parameter, and unmark All rows.
Note: You can also set the value of the Range parameter by selecting the desired data range with the mouse.
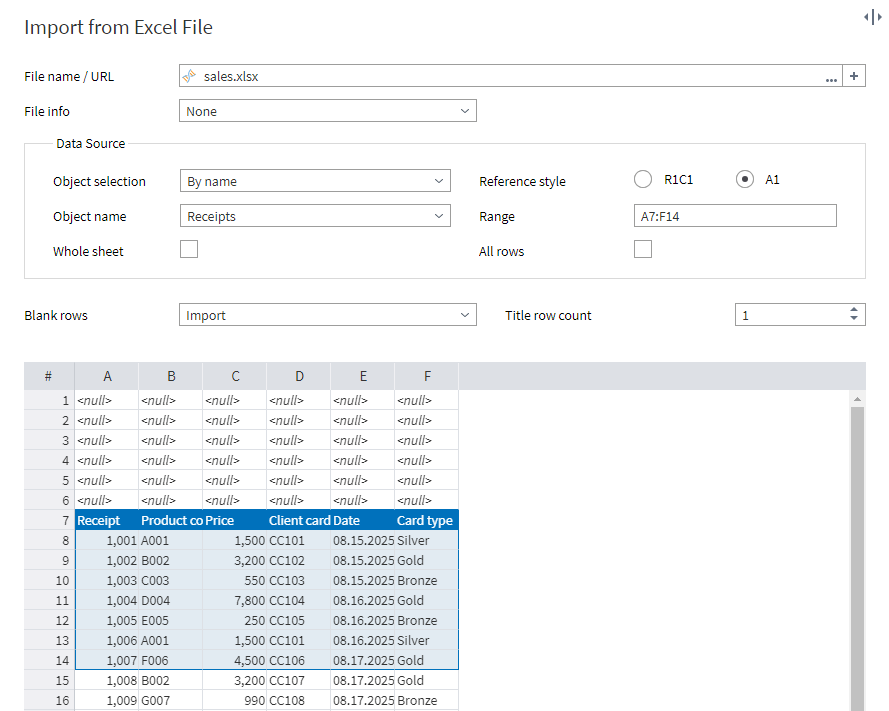
The resulting dataset looks as follows:
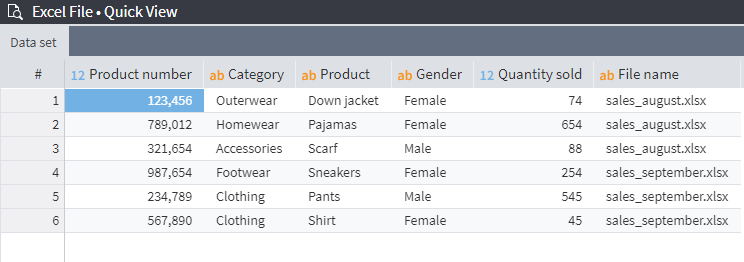
Example 4. Importing multiple files in a single node
To select multiple Excel files for import, click on the  Add button next to the File name/URL field on the first page of the setup wizard. All the selected files will be listed in the File name/URL field, separated by a special character
 |.

If you need to import data from all files located in the same folder, you can set the File name/URL using a wildcard:

The File info setting allows you to add a new field (or fields) with various file characteristics: name, path, and modification time.
At this step of the setup wizard, only the first file's data will be displayed. However, the settings on this page apply to all files you have selected for import.
The next page of the wizard displays data from all available files. However, note that the setup wizard can only display up to 200 rows of your file/files.
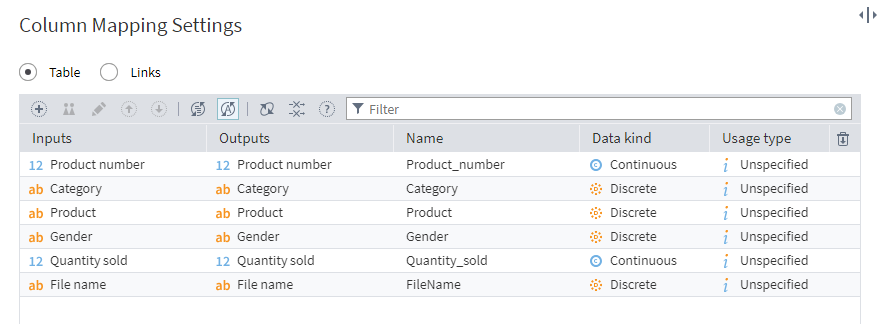
The third step of the setup wizard shows the columns selected for import. Here, you can change their order in the output set.
After you proceed through all wizard pages and run the node, it will read rows from all selected files in line with the specified settings. Here is the resulting dataset for our example:
Read on: Data Import: Kafka